


Smart Tips for Choosing the Perfect 12V LED Pool Light Replacement

Start With a Safe, Compatible 12V LED Pool Light Replacement
A successful 12V LED pool light replacement starts with two checks: confirm your existing light receives 12 volts and choose a replacement that fits its fixture or niche. Shut off the pool-light breaker, verify power is off with a voltage tester, then check the fixture label, transformer, bulb base, and niche size before ordering.
A 12V LED can make evening swims brighter while using far less electricity than an old incandescent or halogen light. Many LED pool lights last up to 50,000 hours and can reduce operating costs by as much as 80%. But voltage is not optional: connecting a 12V light directly to a 120V circuit can permanently damage it.
If your pool has a 120V light, you can often upgrade to low-voltage LED lighting by adding a properly rated 12V pool transformer. The right choice also depends on whether you need a screw-in bulb replacement or a complete sealed fixture with a new cord. For a broader overview of how low-voltage systems compare with standard line-voltage setups, the low voltage lighting principles used in residential and landscape applications provide useful background.
This guide explains how to choose the right light, measure cord length, protect the watertight seal, and safely install a low-voltage upgrade for your backyard pool.
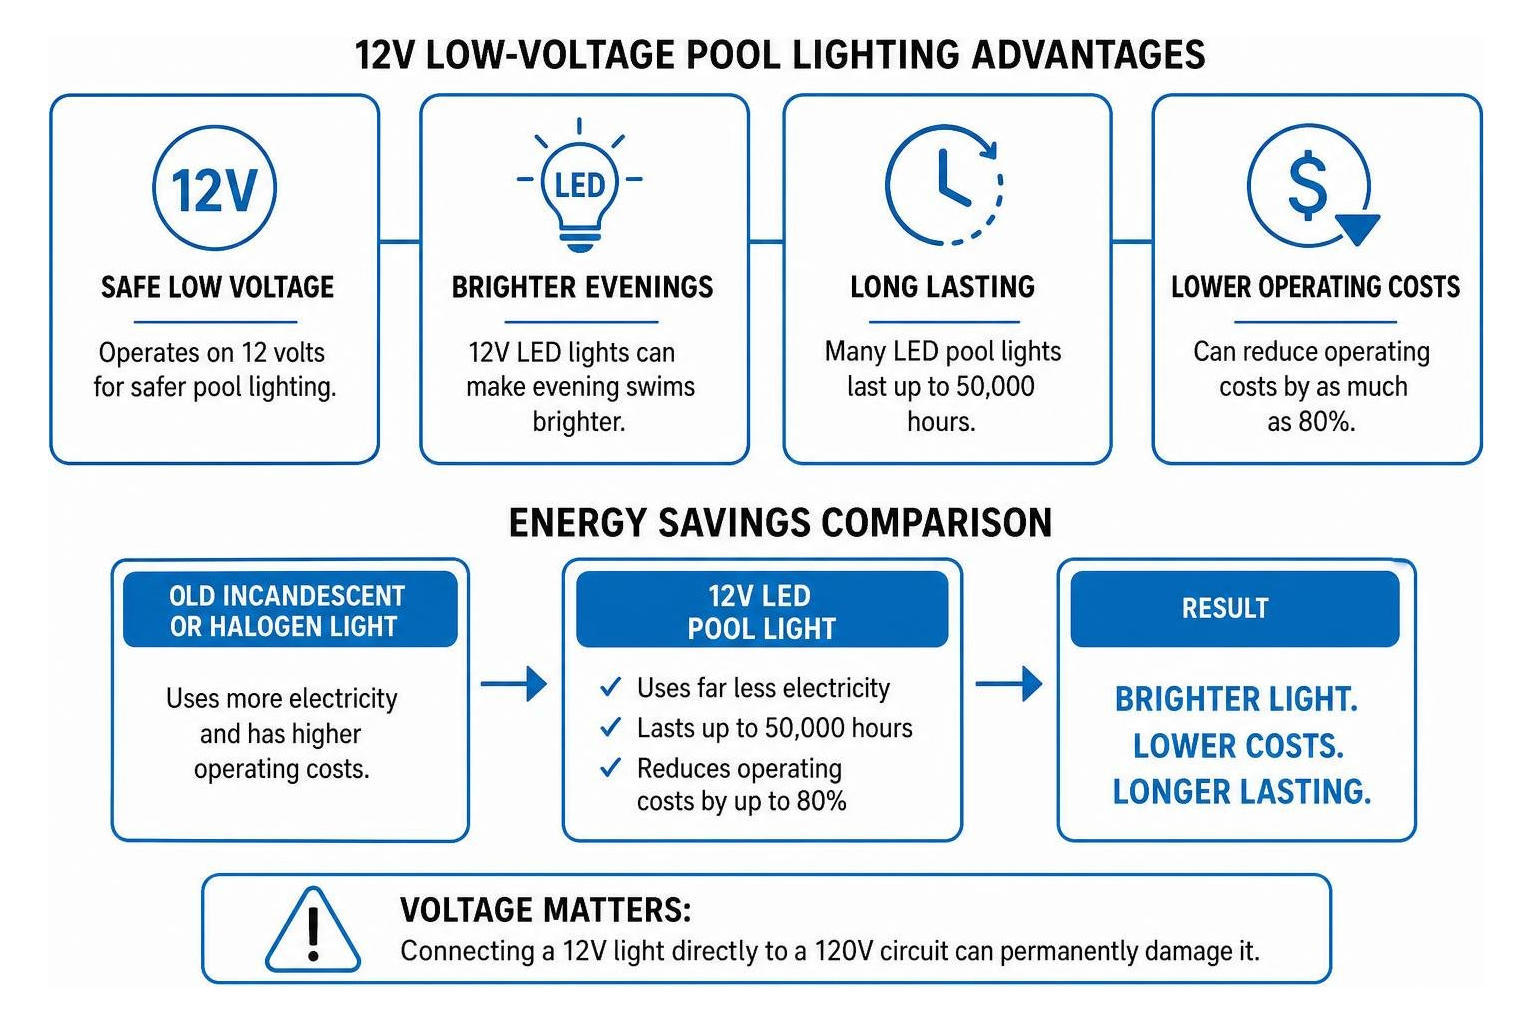
Simple 12v led pool light replacement word guide:
Key Considerations for Choosing Low-Voltage Pool Lighting

Before purchasing any replacement hardware, understanding the electrical foundation of your swimming pool is vital. Exploring the ultimate guide to swimming pool lighting reveals that approximately 80% to 90% of traditional inground pool light fixtures installed in North America were originally built for 120V line-voltage operation. Installing a low-voltage 12V bulb directly into a standard 120V socket results in an instant electrical pop that permanently destroys the sensitive LED circuit board.
To verify whether your system operates at 12V or 120V:
- Inspect the Equipment Pad: Look for an external step-down pool transformer mounted near your electrical subpanel or automated controls.
- Examine Fixture Labels: Remove the wet-niche fixture and read the manufacturer label stamped on the back of the stainless steel housing.
- Check the Existing Lamp: Inspect the markings on the glass face or base of the current bulb for a clear “12V” or “120V” designation.
- Test with a Multimeter: Qualified homeowners or electricians can test the voltage across the secondary terminal connections inside the pool junction box.
Modern electrical codes and pool safety standards increasingly favor low-voltage systems because 12V underwater lighting substantially limits high-voltage shock hazards. If your pool currently runs on standard line voltage, converting the system requires installing a dedicated outdoor low-voltage pool transformer at the equipment pad to step 120V power down to 12V AC before it reaches the pool wall.
Evaluating Sizing, Niche Dimensions, and Voltage Conversion
Pool lighting hardware is not universal. Inground pools generally feature standard large 10-inch diameter niches, while modern compact pools, steps, and spas frequently utilize 1.5-inch threaded nicheless fittings. Reviewing the checklist for buying a compatible 12v pool light will help ensure that the outer bezel, mounting tabs, and locking screws match your exact brand and niche specifications.
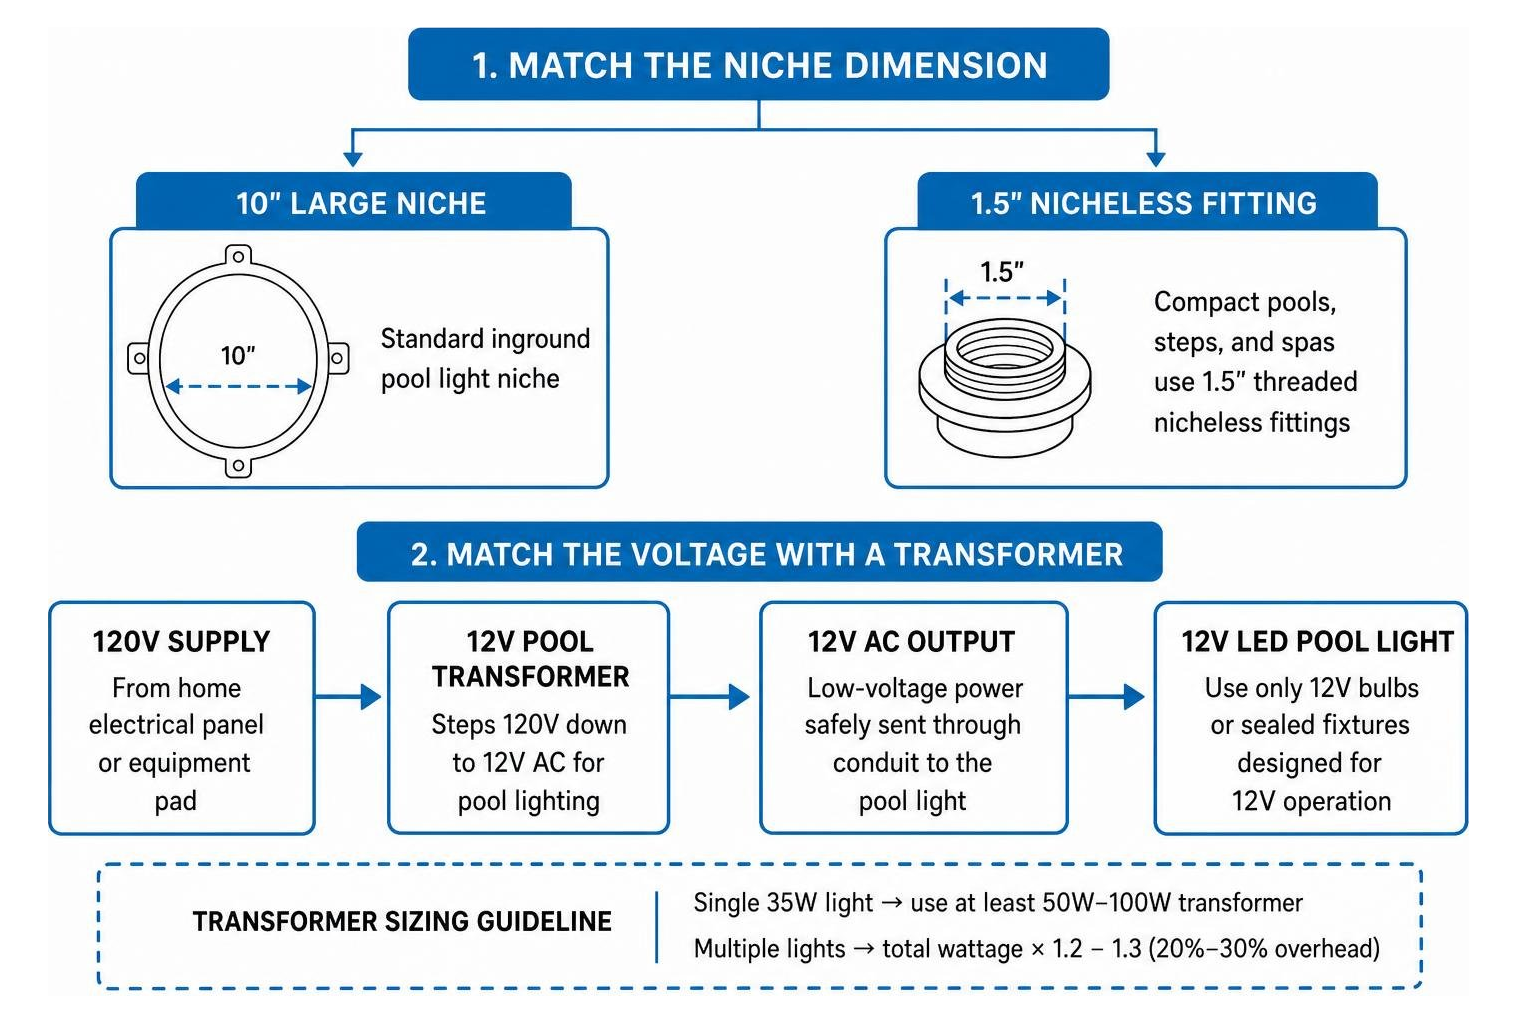
When sizing a low-voltage transformer, select a magnetic, industrial-frequency transformer rather than a delicate electronic transformer, which can generate waveform noise that damages LED drivers. Always calculate your total wattage load with overhead:
- If powering a single 35W LED fixture, use at least a 50W to 100W rated transformer.
- If powering multiple lights across a pool and spa combination, sum the total wattage and choose a transformer capacity that exceeds that load by at least 20% to 30%.
Cord length is another critical specification. Replacement sealed fixtures come pre-wired from the factory with specialized waterproof cords in standard lengths of 50, 100, or 150 feet. Measure the distance from the pool niche, through the underground conduit, all the way to the exterior junction box or transformer. Never splice underwater power cords inside conduit; a single continuous cord run is necessary to eliminate moisture leaks and ground-fault hazards.
Screw-In Bulbs vs. Complete Fixture Replacements and Color Control
Upgrading your pool lighting involves choosing between two main configurations: replacing just the interior screw-in bulb or replacing the entire sealed fixture.
| Feature / Consideration | Screw-In LED Bulb (E26 / Edison Base) | Complete Sealed LED Fixture Replacement |
|---|---|---|
| Installation Difficulty | Moderate (reuses existing wet housing) | Advanced (requires pulling new cable through conduit) |
| Waterproof Protection | Relies entirely on old housing & new silicone gasket | Factory resin-filled or sealed core with IP68 rating |
| Energy Consumption | Typically 15W to 35W (replaces 300W–500W incandescent) | Typically 15W to 40W (high-output lumen delivery) |
| Cord Replacement | No cord pulling required | Includes factory-sealed 50 ft to 150 ft cord |
| Average Service Life | Up to 30,000 to 50,000 operating hours | Up to 50,000 operating hours with superior heat dissipation |
For pool owners seeking dynamic backyard aesthetics, colored pool light options offer fixed color palettes and animated light shows. Modern 12V color-changing LEDs do not require complex automation panels. You can cycle through color modes using your standard manual wall toggle switch by turning the switch off and back on within 1 to 2 seconds.
Many advanced LED models feature an internal memory chip. If the light remains powered off for more than 20 seconds, it saves the active color mode and resumes that exact color when powered back on. To synchronize multiple lights on a shared circuit that fall out of sync:
- Turn the power off for at least 20 seconds.
- Rapidly cycle the power switch on and off three consecutive times within short intervals.
- Turn the switch back on. All connected lights will reset to color program 1 simultaneously.
Step-by-Step 12V LED Pool Light Replacement Process
Following professional pool light installation principles ensures safety and long-term durability. Water and electricity demand complete isolation. Always verify that your dedicated circuit breaker and GFCI outlet are turned completely off before touching any hardware.
One significant advantage of wet-niche pool design is that you rarely need to drain the pool. Installers leave several feet of coiled cable behind the light fixture inside the wet niche, allowing you to lift the entire unit out of the water and service it directly on the pool deck.
Preparing for a 12V LED Pool Light Replacement
Before beginning the installation, assemble the necessary tools and supplies:
- Phillips and flathead screwdrivers
- Non-contact voltage tester and digital multimeter
- Replacement manufacturer silicone lens gasket
- Heavy terrycloth towels (to protect pool coping and lens glass)
- Wire strippers and gel-filled waterproof wire nuts
- High-strength poly pull line and electrical tape
- Mild dish soap or wire-pulling lubricant
- Butyl sealing tape for conduit hubs
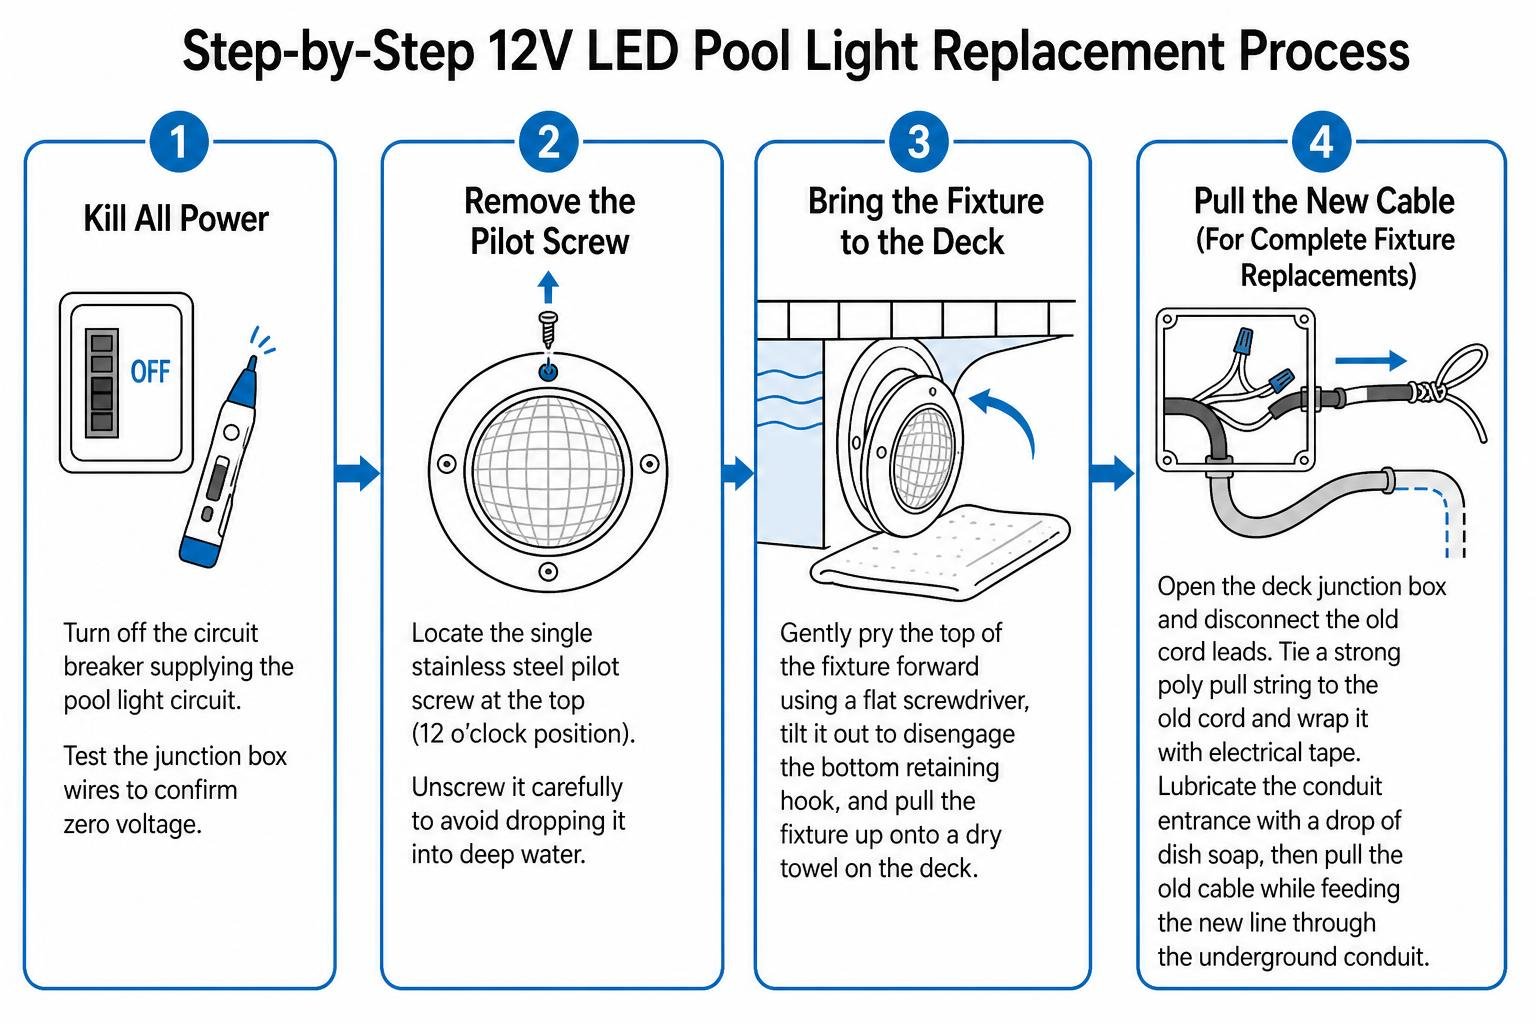
Follow these preparatory steps:
- Kill All Power: Turn off the circuit breaker supplying the pool light circuit. Test the junction box wires with a non-contact voltage tester to confirm zero voltage.
- Remove the Pilot Screw: Locate the single stainless steel pilot screw at the top of the pool light rim (at the 12 o’clock position). Unscrew it carefully to avoid dropping it into deep water.
- Bring the Fixture to the Deck: Gently pry the top of the fixture forward using a flat screwdriver, tilt it out to disengage the bottom retaining hook, and pull the fixture up onto a dry towel on the deck.
- Pull the New Cable (For Complete Fixture Replacements): Open the deck junction box and disconnect the old cord leads. Strip the outer jacket back and securely tie a strong poly pull string to the old cord, wrapping it smoothly in electrical tape. Lubricate the conduit entrance with a drop of liquid dish soap, then pull the old cable from the pool side while feeding the new line through the underground conduit.
- Prepare the Fixture Housing (For Bulb Replacements): Unbolt the outer brass or stainless steel clamping ring, lift away the glass lens, and discard the old lens gasket. Unscrew the burnt-out bulb, thoroughly dry the inside of the housing, and thread the new 12V LED replacement bulb into the Edison base.
Final 12V LED Pool Light Replacement Assembly and Testing
Reassembling the underwater housing requires strict attention to sealing geometry. The replacement silicone lens gasket is directional and asymmetrical. Position the thick molded channel flat against the metal fixture housing lip, with the glass lens seated firmly in the opposite channel.
Tighten the perimeter clamp band screws using an alternating cross-pattern (tightening opposite sides sequentially) until torqued evenly to approximately 20 inch-pounds. This creates uniform compression across the silicone seal without pinching.
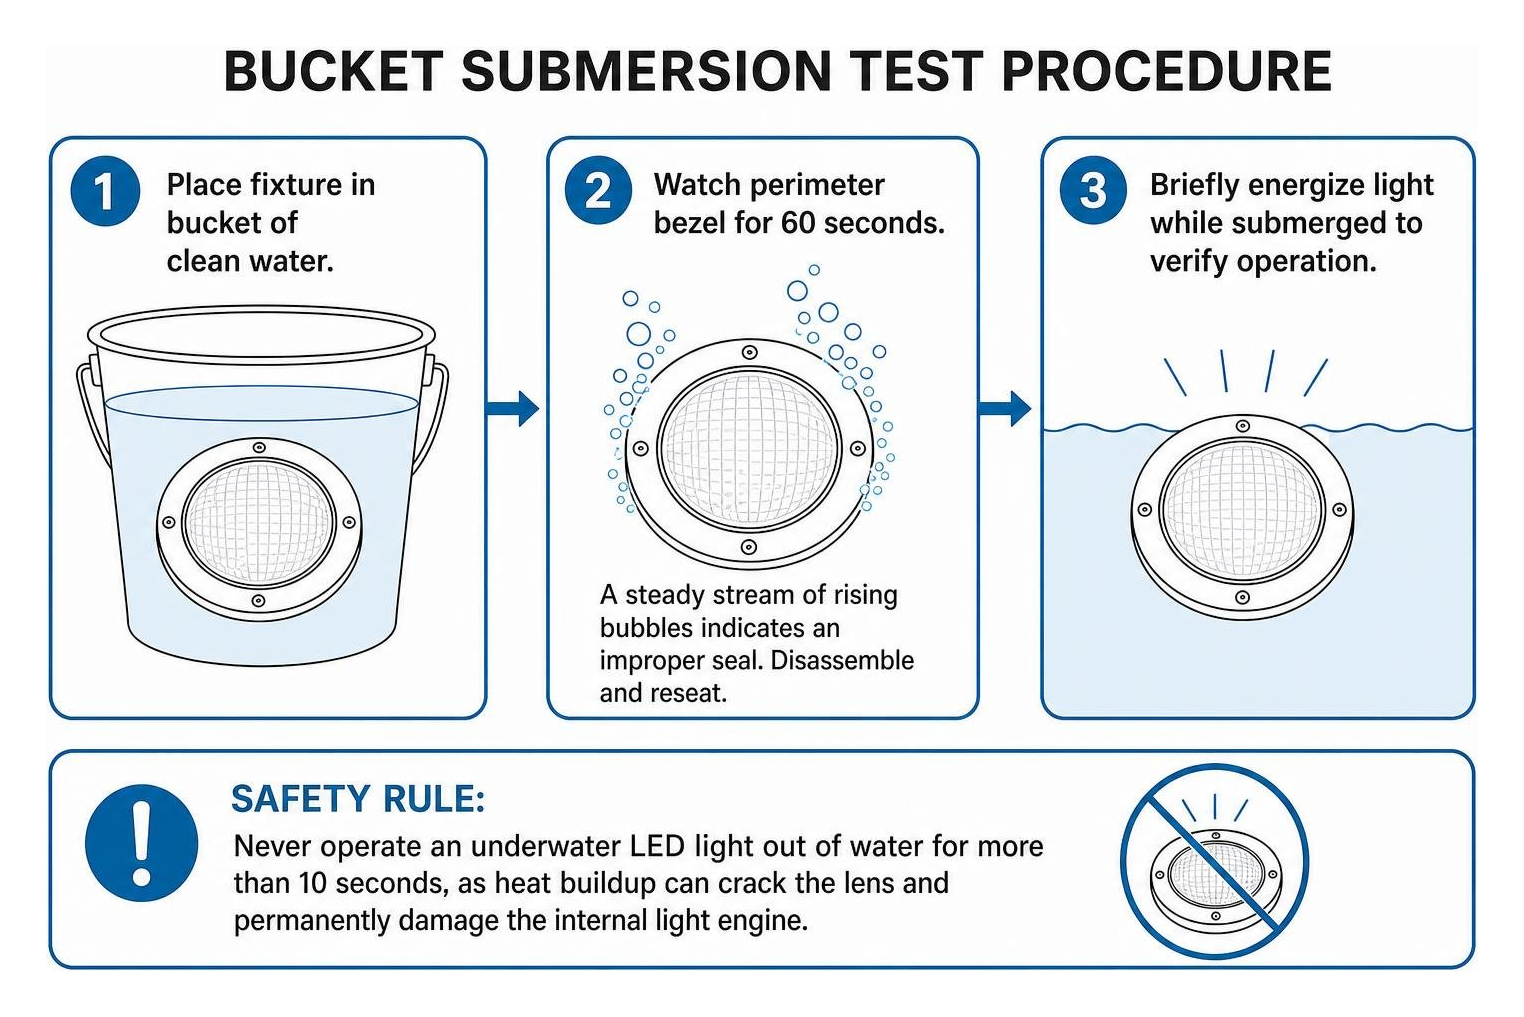
Perform a watertightness bucket test before submerging the unit in the pool:
- Place the fully reassembled fixture into a five-gallon bucket of clean water.
- Watch the perimeter bezel closely for 60 seconds. A steady stream of rising bubbles indicates an improper seal that requires disassembly and reseating.
- Briefly energize the light while submerged to verify operation. Safety Rule: Never operate an underwater LED light out of water for more than 10 seconds, as heat buildup can crack the lens and permanently damage the internal light engine.
Once testing is complete, coil the excess power cable counterclockwise inside the rear cavity of the wall niche. Hook the bottom bracket of the fixture into the lower niche notch, press the top flush against the pool wall, and secure the OEM pilot screw. This pilot screw serves as a mechanical fastener and a bonding connection that grounds the housing to the niche.
For homeowners in Northeastern Pennsylvania seeking high-quality hardware and accessories, picking up genuine Wilkes-Barre swimming pool supplies guarantees dependable performance throughout cold winter freeze cycles and hot summer swimming seasons.
Experience the Aqua Leisure Difference
Whether upgrading an inground lighting setup or scheduling seasonal pool maintenance, Aqua Leisure Pools and Spas provides comprehensive support across Pennsylvania. With convenient showroom locations in Wilkes-Barre, Dickson City, and Bartonsville, their experienced team helps you choose energy-efficient low-voltage equipment and reliable replacement components to keep your pool glowing safely for years to come.
Posted by Aqua Leisure Pools & Spas in Pools